Get Started
Passwordless.dev is a software toolkit that empowers web developers to build applications that easily authenticate end-users using FIDO2 WebAuthn passkeys. In this guide, we'll chart the quickest path to implementing Passwordless.dev for your website.
Tips
This guide will skip over some conceptual basics in order to get you started as quickly as possible. Check out Concepts for in-depth discussion of the ideas used by Passwordless.dev.
In this guide we'll provide JavaScript examples, however you can check out sample code, guidelines, and tips for other toolkits in Backend Language Examples and Frontend Framework Examples.
Sign up
Sign up for a free Passwordless.dev account. Bitwarden offers a free Passwordless.dev account, or paid plans that unlock certain tiers of usage and features.
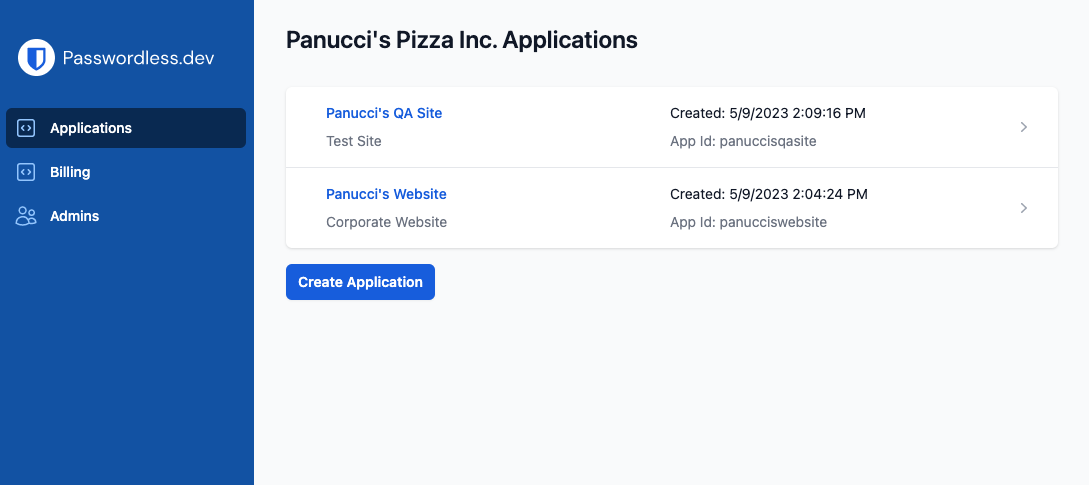
When you sign up you'll land on the admin console, your primary GUI for creating and configuring applications, monitoring application usage, and managing billing:
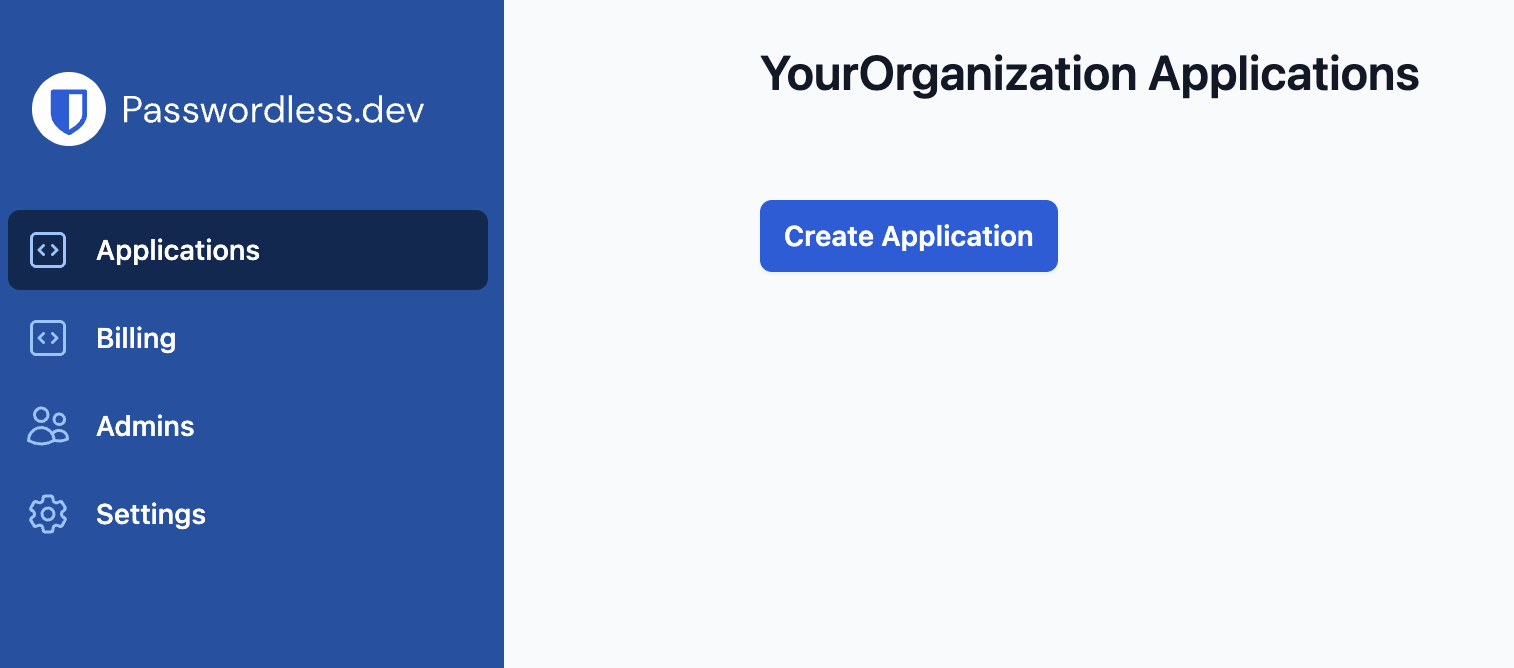
Create an application
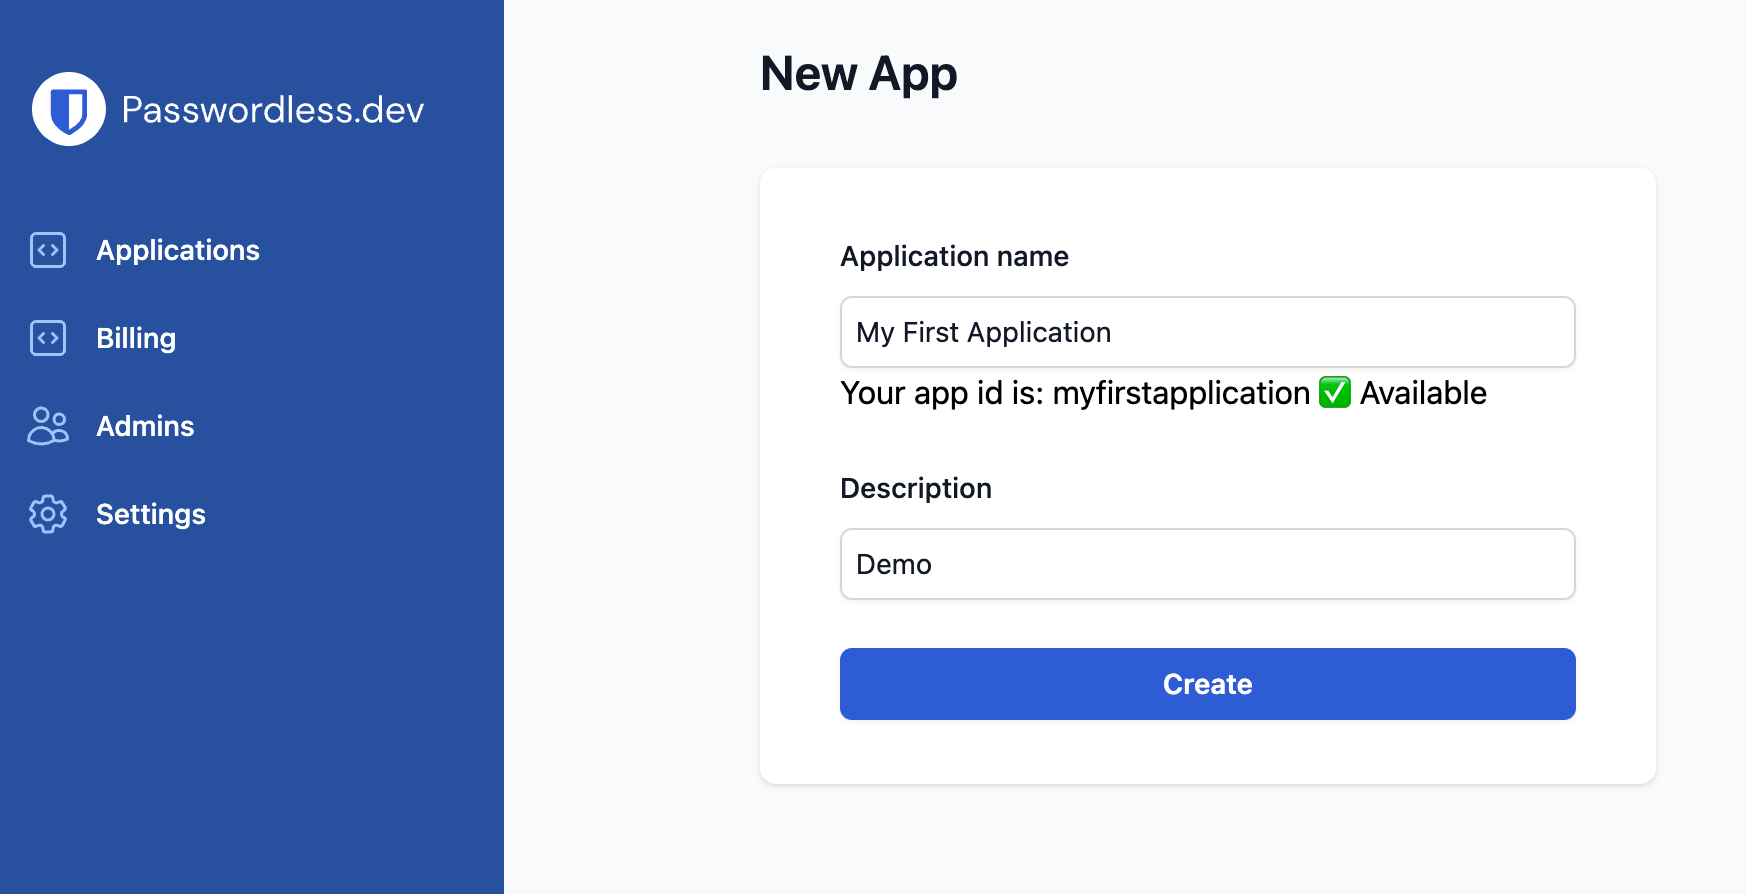
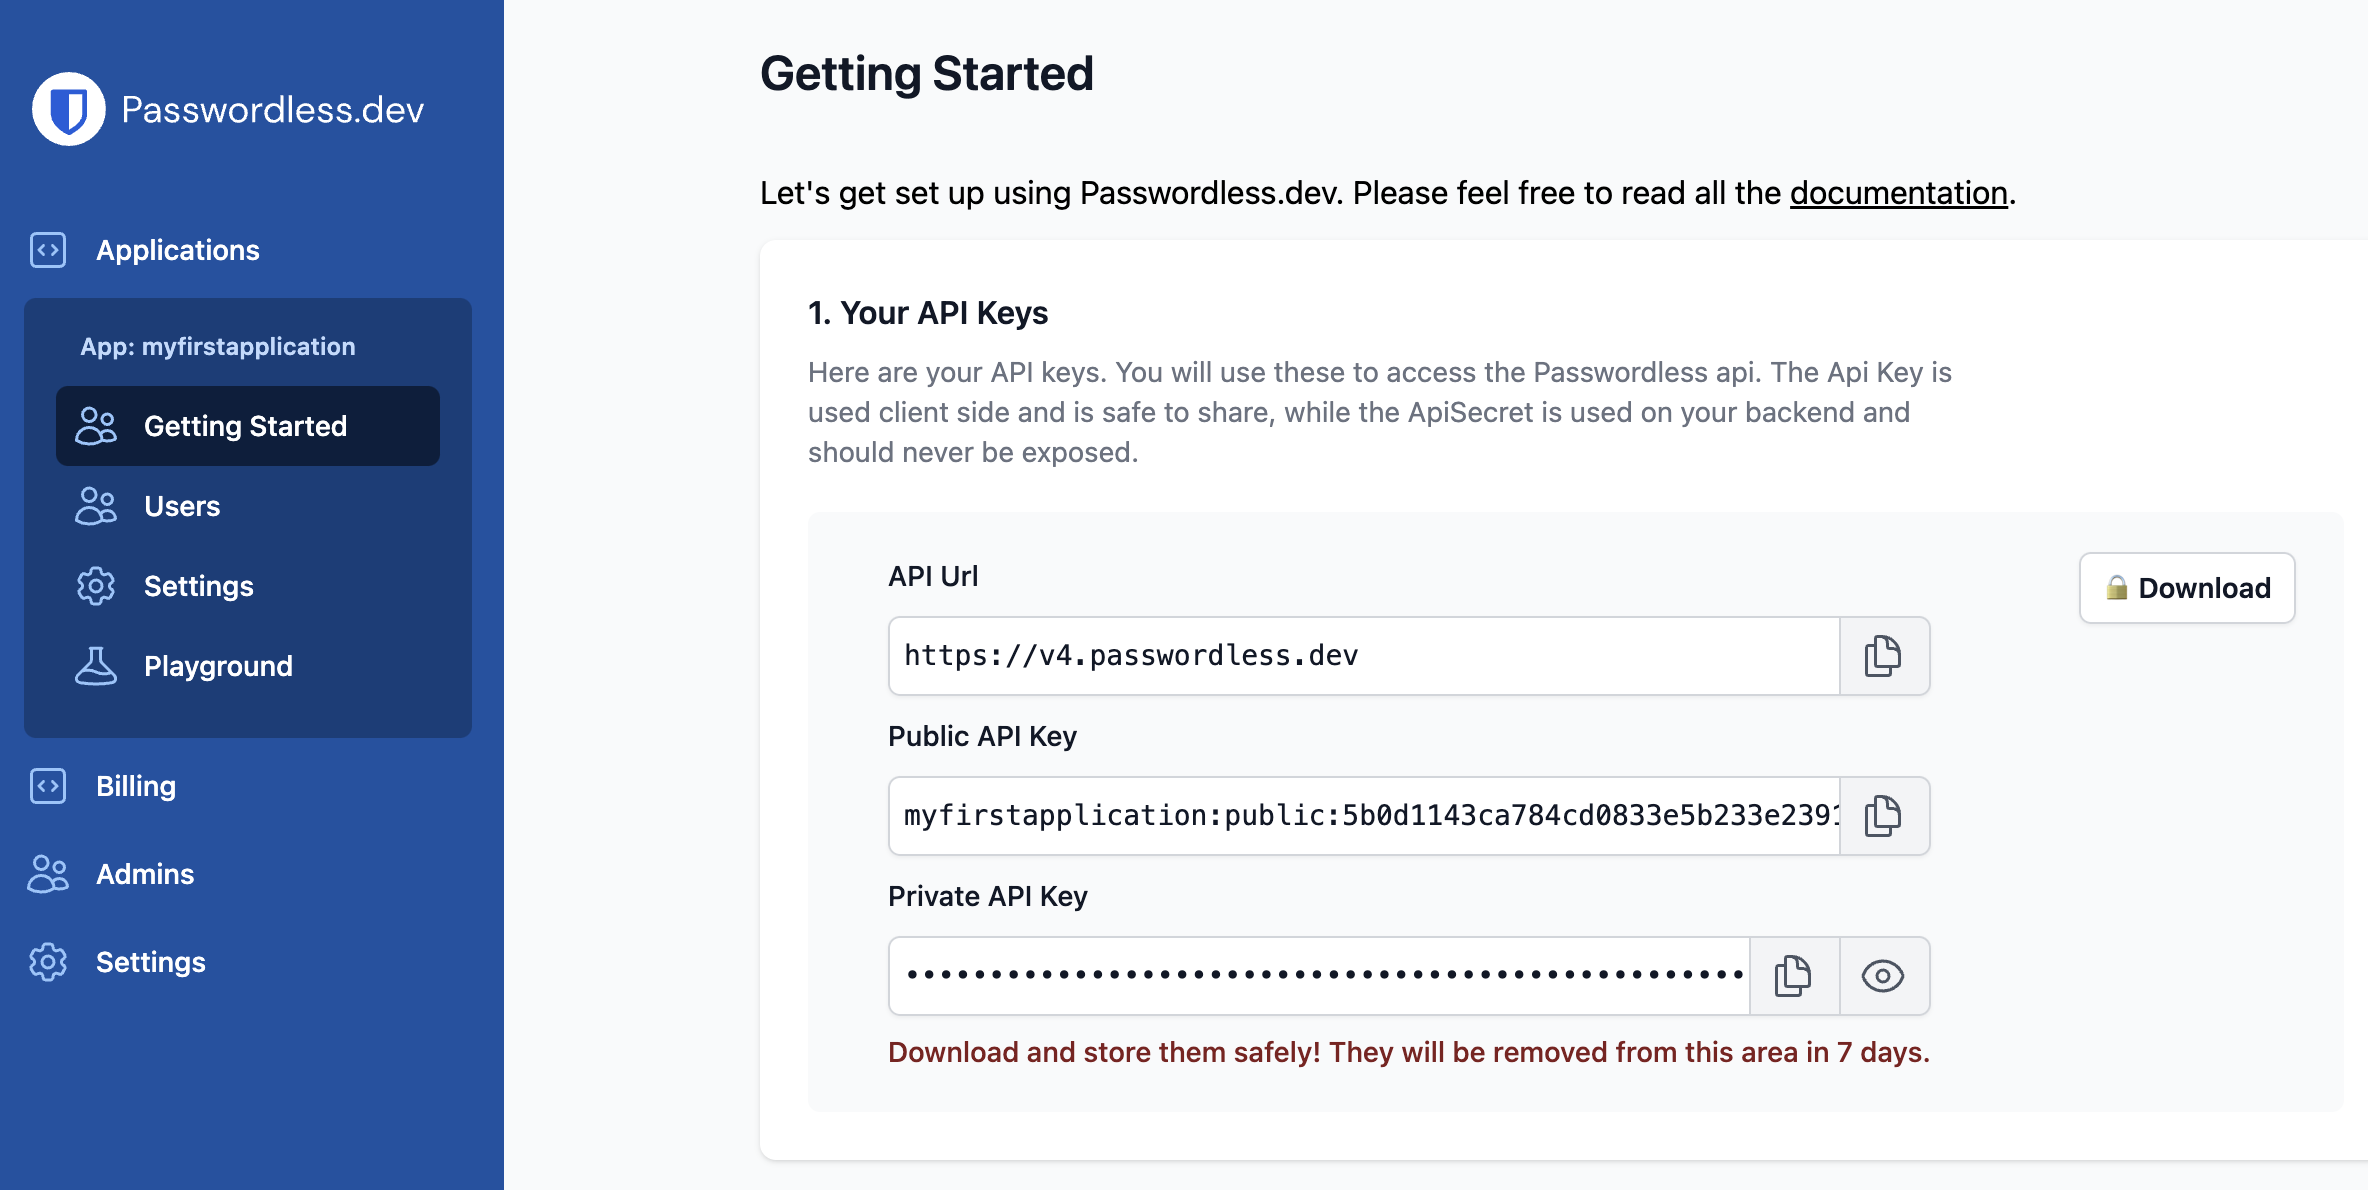
Select the Create Application button and give your new application an Application name and Description. For each application, a set of API keys will be generated. You'll use these API keys for authentication with the Passwordless.dev API. Save your public key and private secret somewhere safe, like Bitwarden Secrets Manager.
Warning
It's important to download your API keys to a safe place, as they will be removed from the admin console after 7 days.
Install the library
Next, install the Passwordless.dev JavaScript client library, either globally or as a module within your application. This library will allow your application to interact with the Passwordless.dev API and with browsers' WebAuthn API. To install the library:
yarn add @passwordlessdev/passwordless-client
npm install @passwordlessdev/passwordless-client
<script
  src="https://cdn.passwordless.dev/dist/1.1.0/esm/passwordless.min.mjs"
  type="module"
  crossorigin="anonymous"
></script>
<script
  src="https://cdn.passwordless.dev/dist/1.1.0/umd/passwordless.umd.min.js"
  crossorigin="anonymous"
></script>
In all cases, your frontend must import the library to call the methods used by Passwordless.dev:
import { Client } from '@passwordlessdev/passwordless-client';
import { Client } from '@passwordlessdev/passwordless-client';
<script type="module">
  import { Client } from 'https://cdn.passwordless.dev/dist/1.1.0/esm/passwordless.min.mjs';
</script>
<script>
  const Client = Passwordless.Client;
  const p = new Client({});
</script>
Build a registration flow
Next, implement a workflow on your backend and frontend for registering a passkey. At a high-level, here's what you'll be doing:
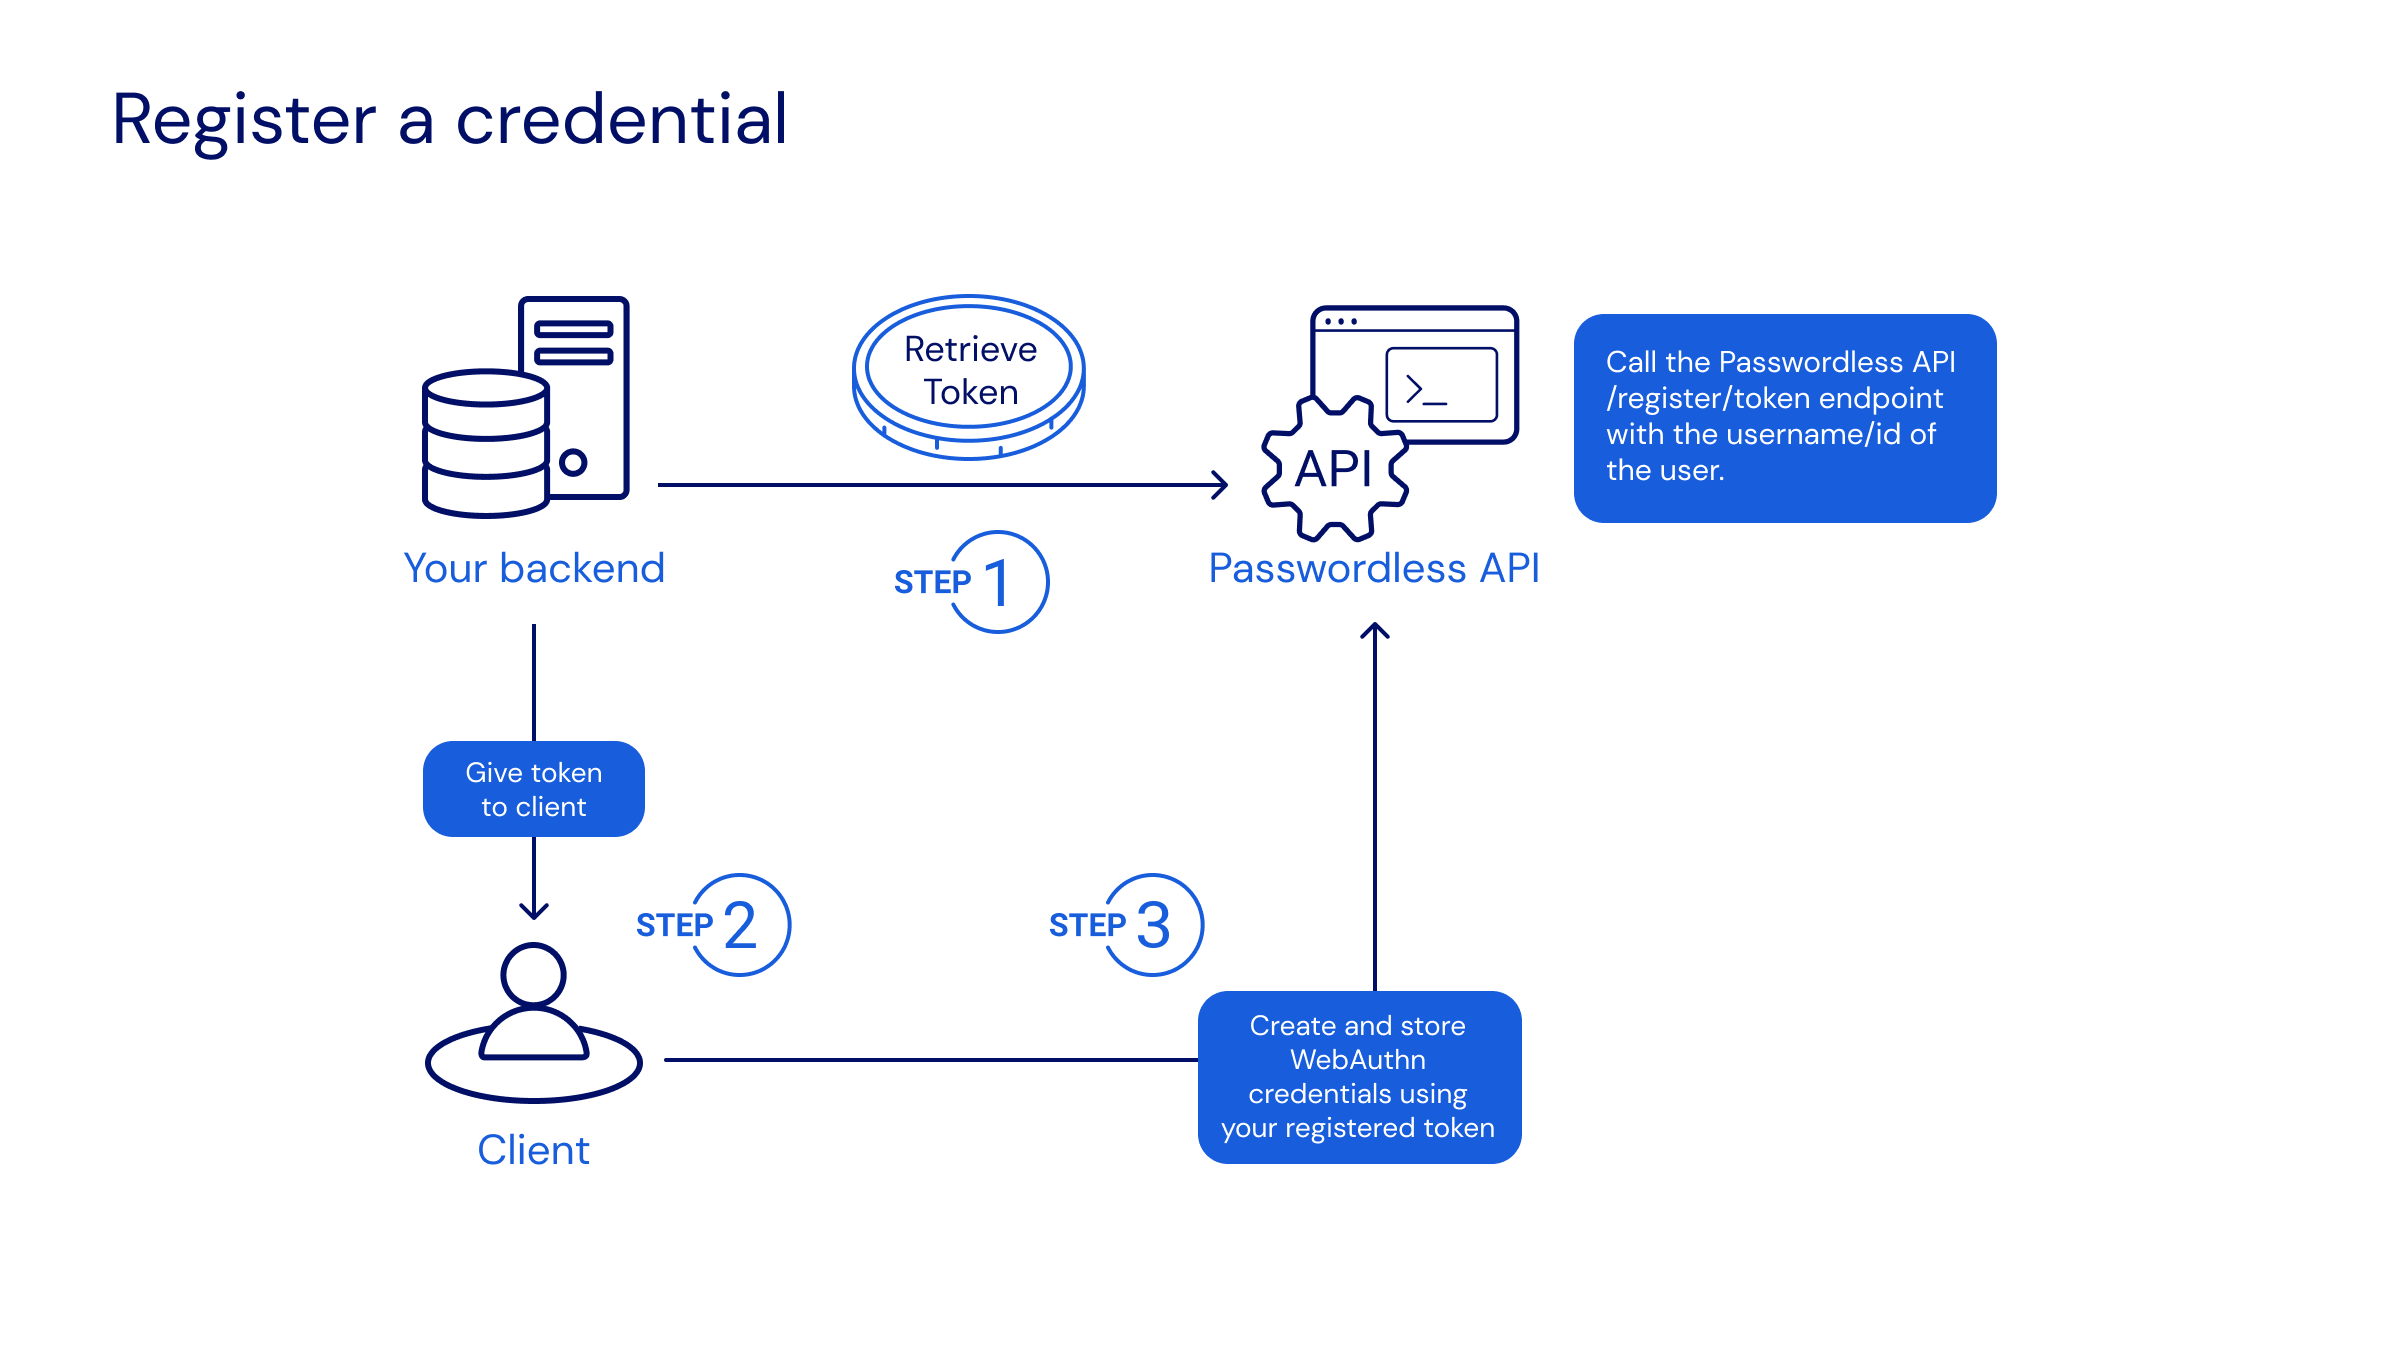
Let's break down these steps:
- On your backend, generate a registration token by calling the passwordless.dev API's
/register/tokenendpoint (What is a token?). While you can send in a number of options, the minimum arguments areuserIdandusername, for example:
// Node.js - Code written for this step should run on your backend.

const payload = {
  userId: '107fb578-9559-4540-a0e2-f82ad78852f7', // Required. A WebAuthn User Handle, which should be generated by your application. Max. 64 bytes.
  username: '[email protected]' // Required. A human readable username used for user authentication, should be chosen by the user.
  // ...For more options, please see the API reference for /register/token.
};

// POST the payload to the Passwordless.dev API using your API private secret.
const apiUrl = 'https://v4.passwordless.dev';
const { token } = await fetch(apiUrl + '/register/token', {
  method: 'POST',
  body: JSON.stringify(payload),
  headers: {
    'ApiSecret': 'myapplication:secret:11f8dd7733744f2596f2a28544b5fbc4',
    'Content-Type': 'application/json'
  }
}).then((r) => r.json());
Successful implementation will create a registration token that is returned as a string, for example:
{ "token": "register_wWdDh02ItIvnCKT_02ItIvn..." }
Tips
Should your API request fail, you will receive a error response with json-formatted problem details.
- On your frontend, initiate the WebAuthn process to create and store a passkey using the generated registration token (learn more), for example:
// Code written for this step should run on your frontend.
import { Client } from '@passwordlessdev/passwordless-client';

// Instantiate a passwordless client using your API public key.
const p = new Client({
  apiKey: 'myapplication:public:4364b1a49a404b38b843fe3697b803c8'
});

// Fetch the returned registration token from the backend.
const backendUrl = 'https://localhost:7002'; // Your backend.
const registerToken = await fetch(backendUrl + '/create-user').then((r) => r.json());

// Register the token with the end-user's device.
const { token, error } = await p.register(registerToken);
if (token) {
  // Successfully registered!
} else {
  console.error(error);
}
Successful implementation will prompt Passwordless.dev to negotiate creation of a passkey through the user's web browser API and save its public key to the database for future sign-in operations.
Build a signin flow
Next, implement a workflow on your backend and frontend for signing in with a passkey. At a high-level, here's what you'll be doing:
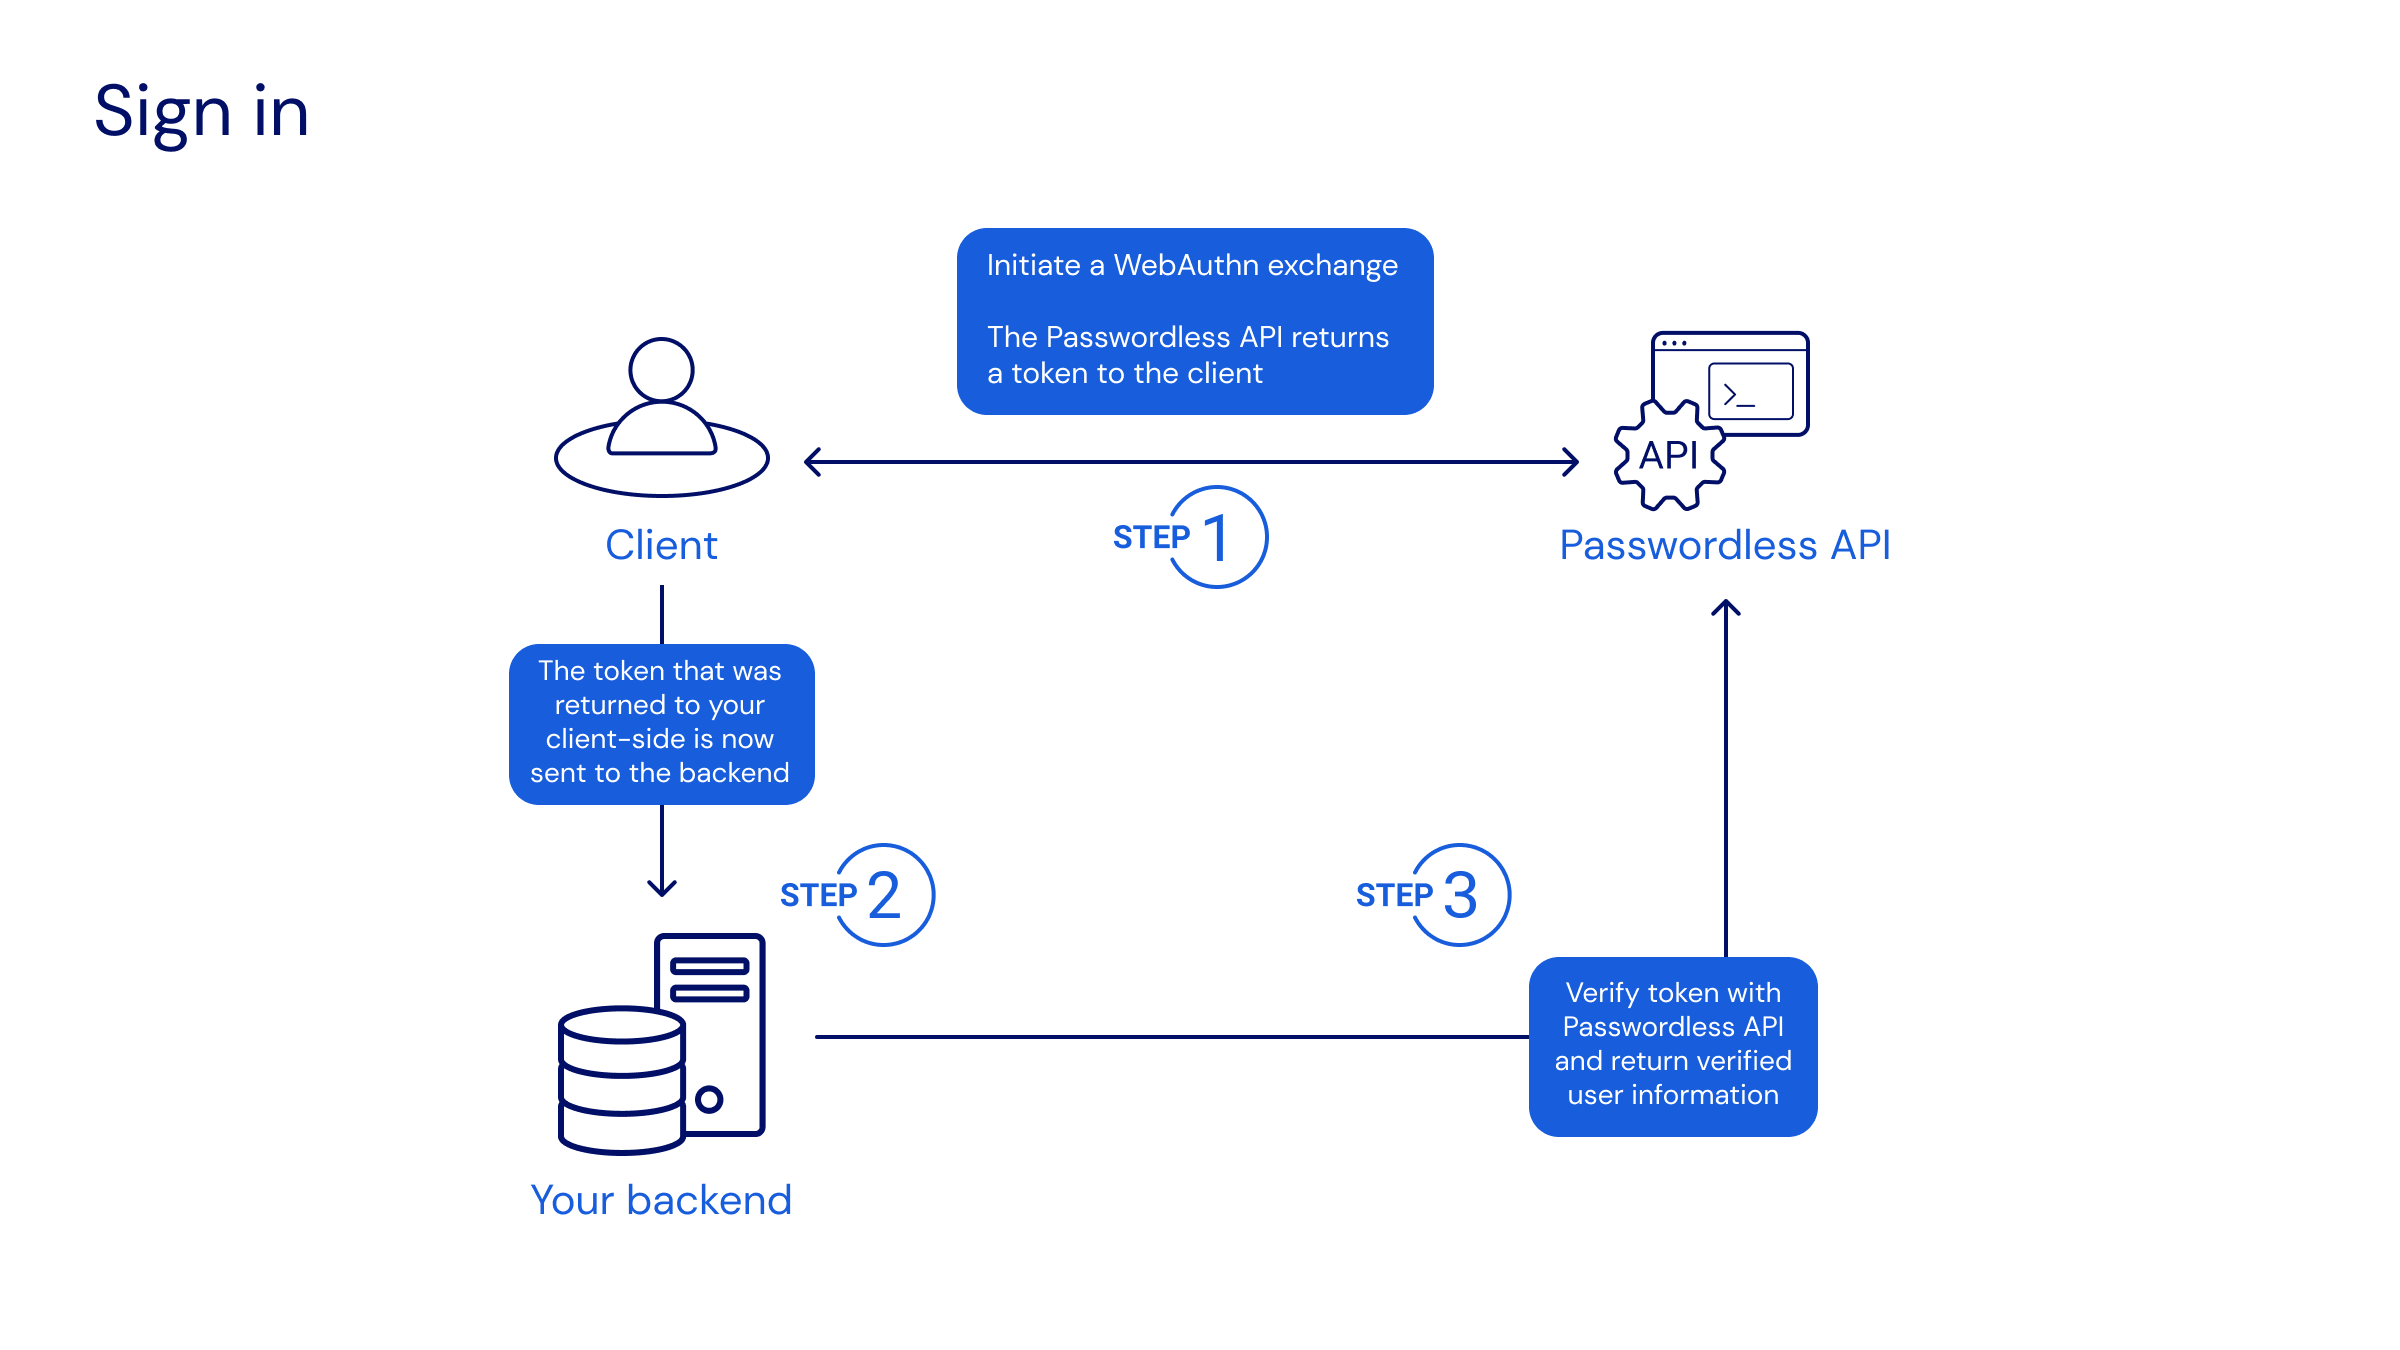
Code that you write must:
- On your frontend, initiate your sign-in and retrieve an authentication token that will be checked by your backend to complete a sign-in. To initiate the sign-in, you can use an alias, userId, or Discoverable Credential (learn more), for example:
// Code written for this step should run on your frontend.

// Instantiate a passwordless client using your API public key.
const p = new Client({
  apiKey: 'myapplication:public:4364b1a49a404b38b843fe3697b803c8'
});

// Allow the user to specify a username or alias.
const alias = '[email protected]';

// Generate an authentication token for the user.
const { token, error } = await p.signinWithAlias(alias);
// Tip: You can also try p.signinWithDiscoverable();

// Call your backend to verify the generated token.
const backendUrl = 'https://localhost:7002'; // Your backend.
const verifiedUser = await fetch(backendUrl + '/signin?token=' + token).then((r) => r.json());
if (verifiedUser.success === true) {
  // If successful, proceed!
}
Successful implementation will make an authentication token available to the backend. In the above example, the client waits for the backend to return true (step 2) before proceeding to act on the confirmed sign-in.
- Validate the authentication token by calling the Passwordless.dev API's
/signin/verifyendpoint (learn more) with generated token, for example:
// Code written for this step should run on your backend.

// Fetch the authentication token from your frontend.
const token = { token: req.query.token };

// POST the authentication token to the Passwordless.dev API using your API private secret.
const apiUrl = 'https://v4.passwordless.dev';
const response = await fetch(apiurl + '/signin/verify', {
  method: 'POST',
  body: JSON.stringify({ token }),
  headers: {
    'ApiSecret': 'myapplication:secret:11f8dd7733744f2596f2a28544b5fbc4',
    'Content-Type': 'application/json'
  }
});

// Cache the API response (see below) to a variable.
const body = await response.json();

// Check the API response for successful verification.
// To see all properties returned by this endpoint, checkout the Backend API Reference for /signin/verify.
if (body.success) {
  console.log('Successfully verified sign-in for user.', body);
  // Set a cookie/userid.
} else {
  console.warn('Sign in failed.', body);
}
Successful implementation of the above POST will return a success response including the user's userId, for example:
{
  "success": true,
  "userId": "123",
  "timestamp": "2021-08-01T01:33:36.9773187Z",
  "rpid": "example.com",
  "origin": "http://example.com:3000",
  "device": "Chrome, Windows 10",
  "country": "",
  "nickname": "Home laptop",
  "credentialId": "Mq1ZhrHBmhly34YaO/uuXuNuf/VCHDkuknENz/LZJR4=",
  "expiresAt": "2021-08-01T01:35:36.9773193Z"
}
Use the .success value (true or false) to determine next actions, i.e. whether to complete the sign-in (step 1) by, for example, setting a cookie.
Next steps
Congratulations on mastering a basic implementation of Passwordless.dev! Next:
- Check out other Backend Languages and Frontend Frameworks to find the best fit for your application.
- Dig into the functionality offered by the Admin Console.
- Figure out the best plan to fit the needs of your application or business.